Just connect QYON Bill to Xero to manage finances, clients and suppliers automatically and securely.
Overview
Qyon Bill integrates seamlessly with Xero, enabling businesses to synchronize financial data between both platforms. This integration helps accountants and business owners streamline their bookkeeping by connecting invoices, bills, suppliers, customers, and products.
Connection flow
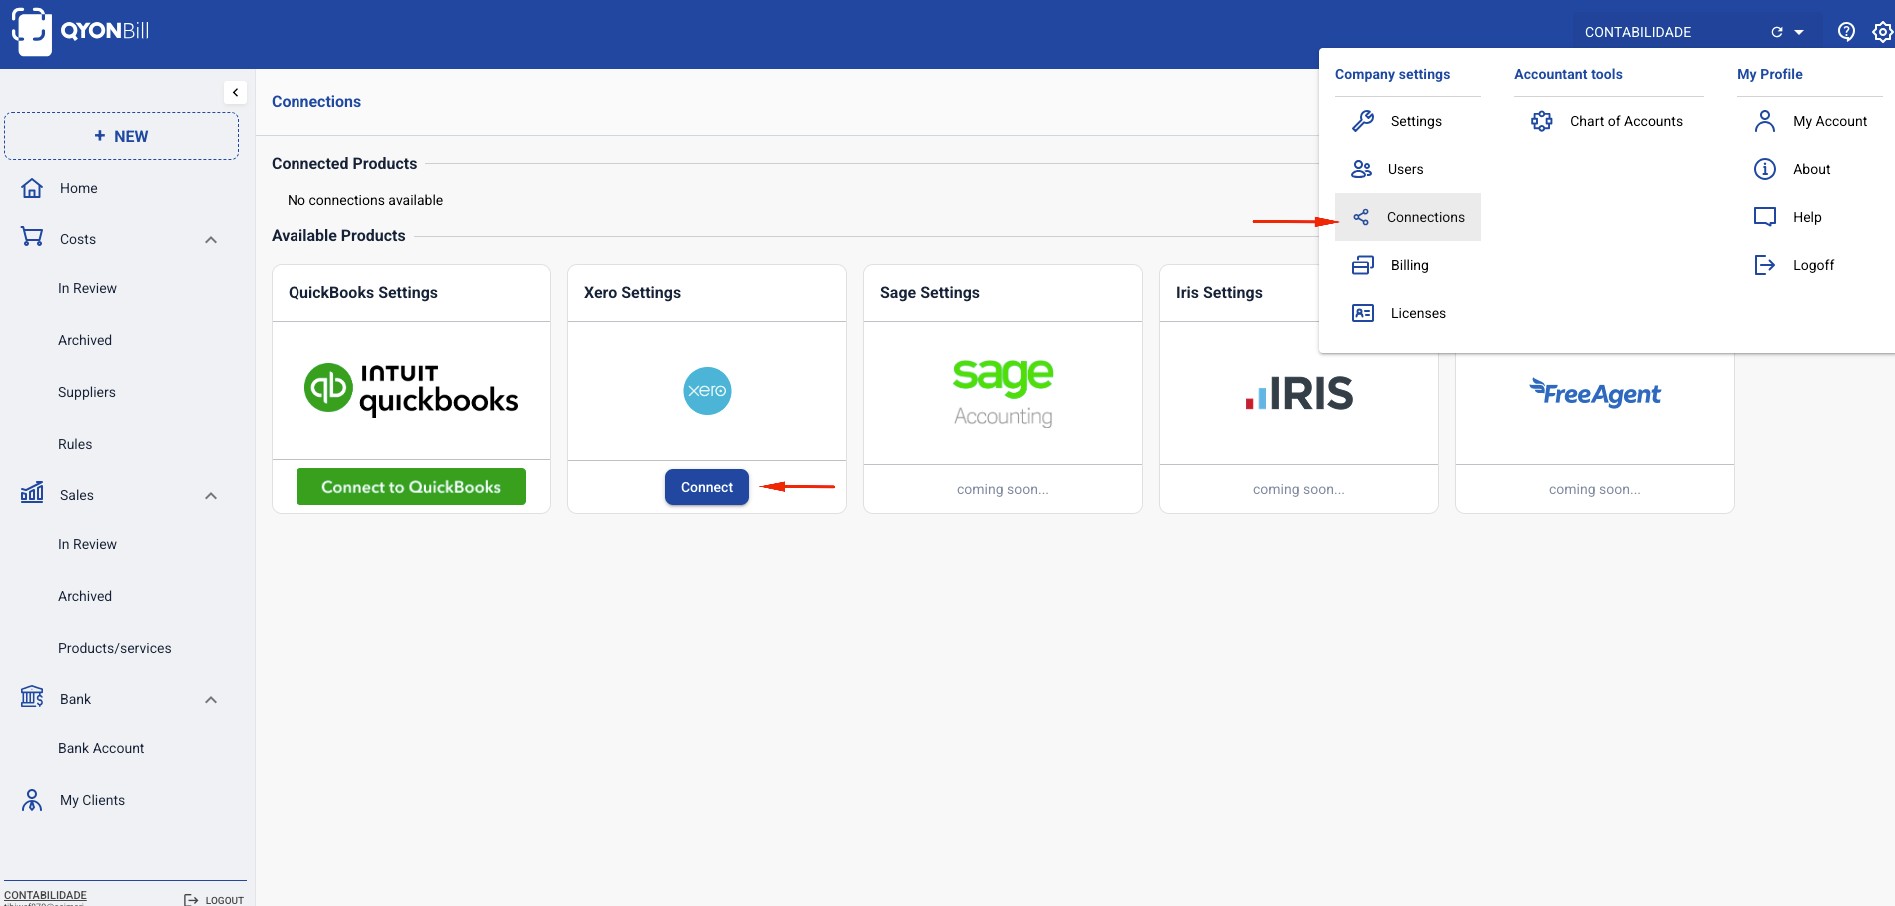
Step 1 – Connect to Xero
Click on Connections in the settings menu (gear icon), then select Connect to Xero. You will be asked by Xero to consent and allow the access.
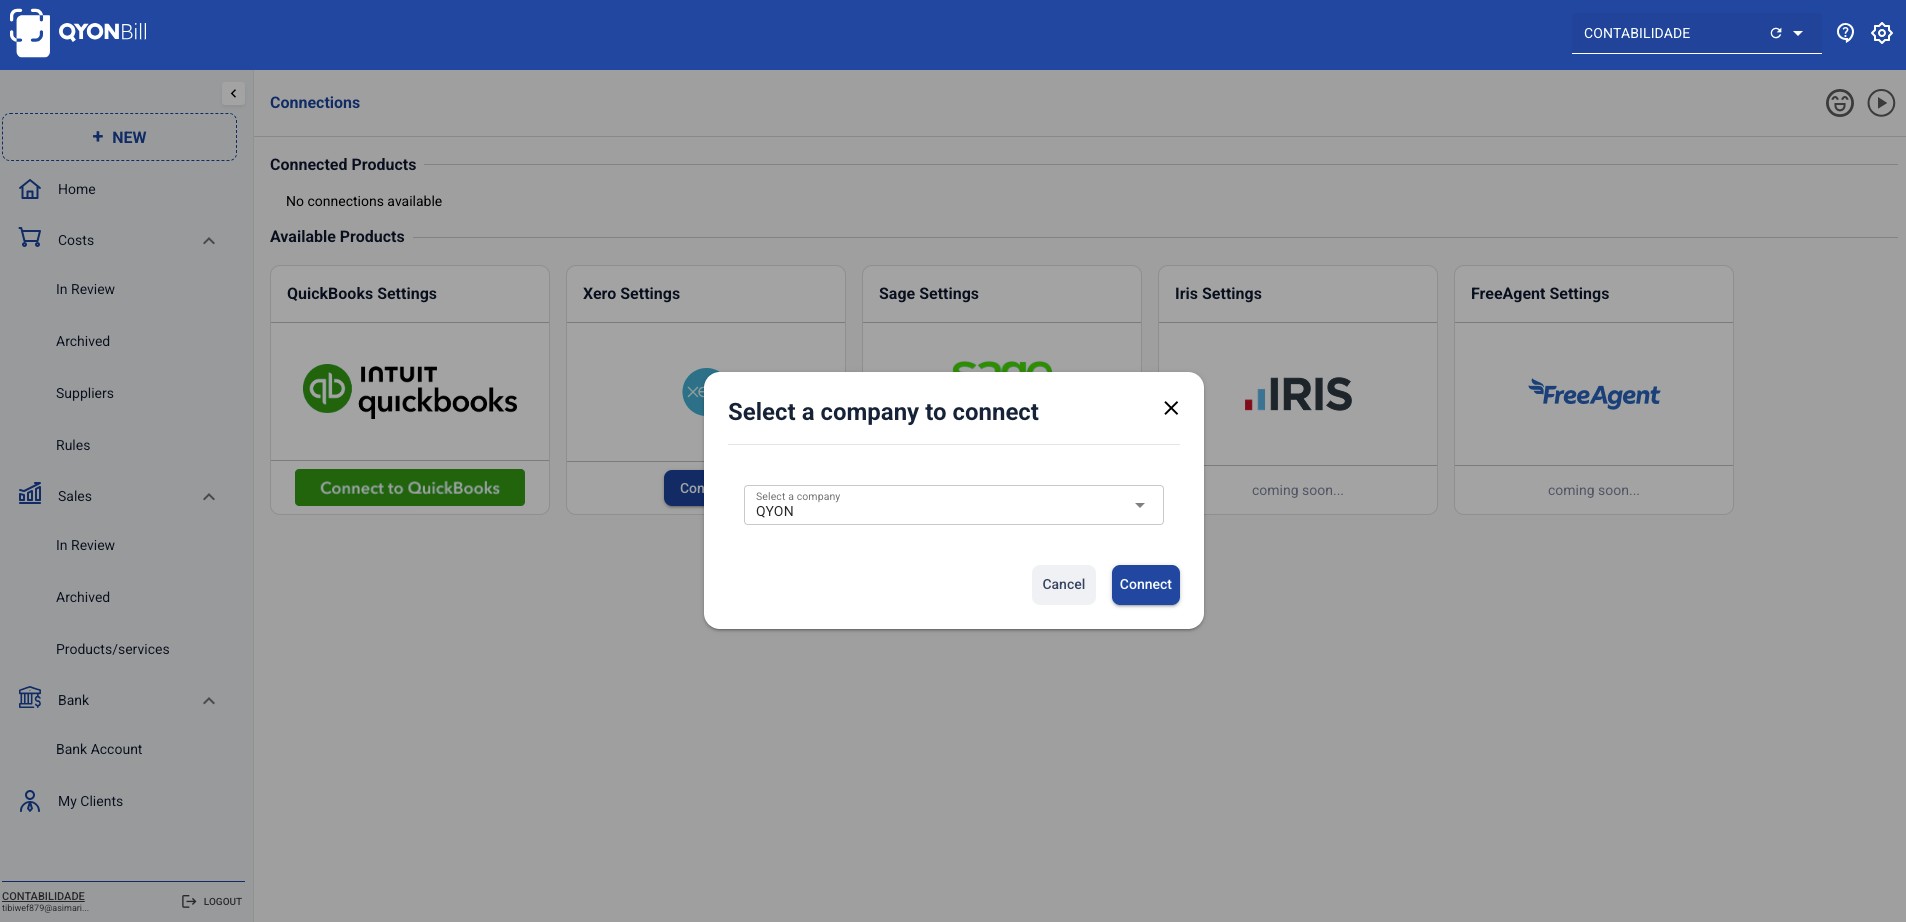
Step 2 – Select a company to connect
Select the company you want to connect, and then click in “Connect” to proceed.
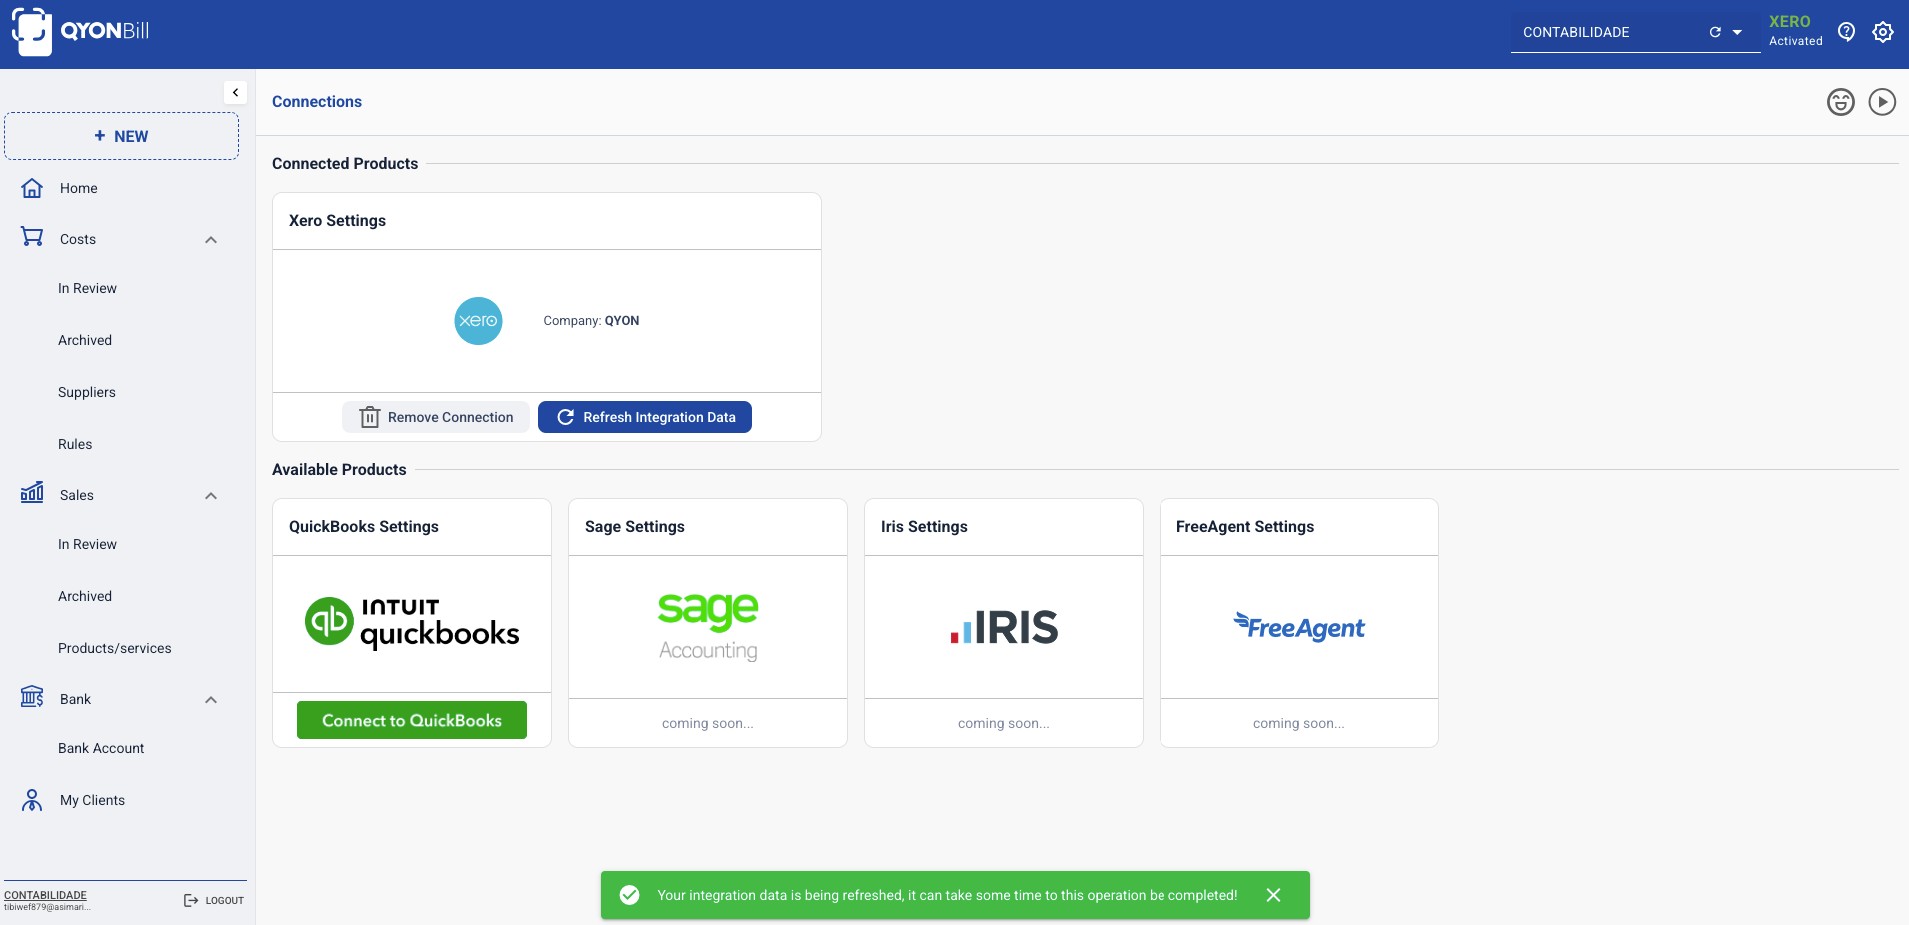
Step 3 – Now you are connected
After connection, QYON Bill will start to retrieve suppliers, customers, products and chart of accounts from Xero. It will take less than a minute to have everything setup and done to continue. Also, you can disconnect from Xero at any time clicking in “Remove connection”. If you register new suppliers, customers, etc on Xero, you can always click in “Refresh Integration Data” to refresh the data again.
What you can do with QYON BILL when connected to Xero
Once your Xero integration is complete, you’ll be able to:
Access accurate metrics and insights about your business.
Manage suppliers, customers, products, and your chart of accounts directly from Qyon Bill.
Create and sync suppliers, customers, and products seamlessly between Qyon Bill and Xero.
Publish bills and sales directly to Xero.
Handle multi-currency transactions with ease, supported by Qyon Bill’s integrated currency database.
Convert PDF bank statements into Excel for easier reconciliation.
…and much more.
Publish a document
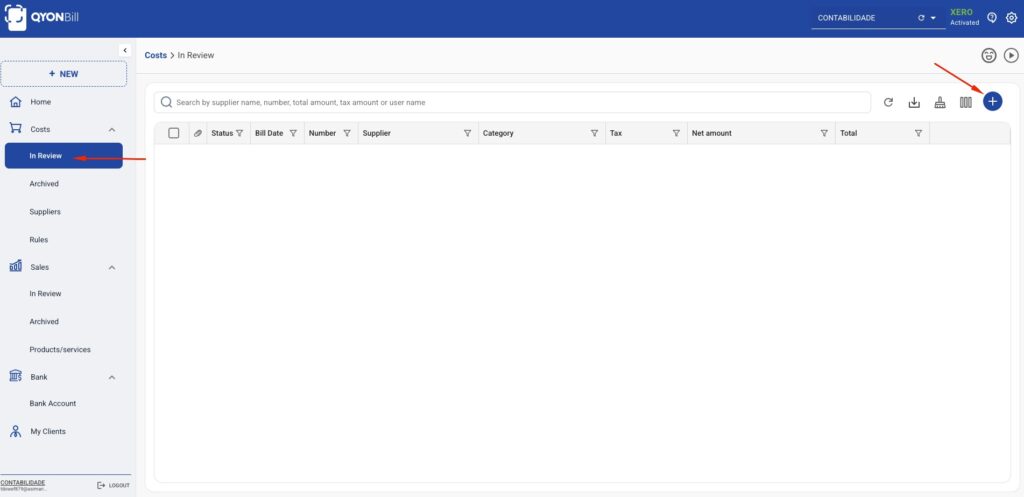
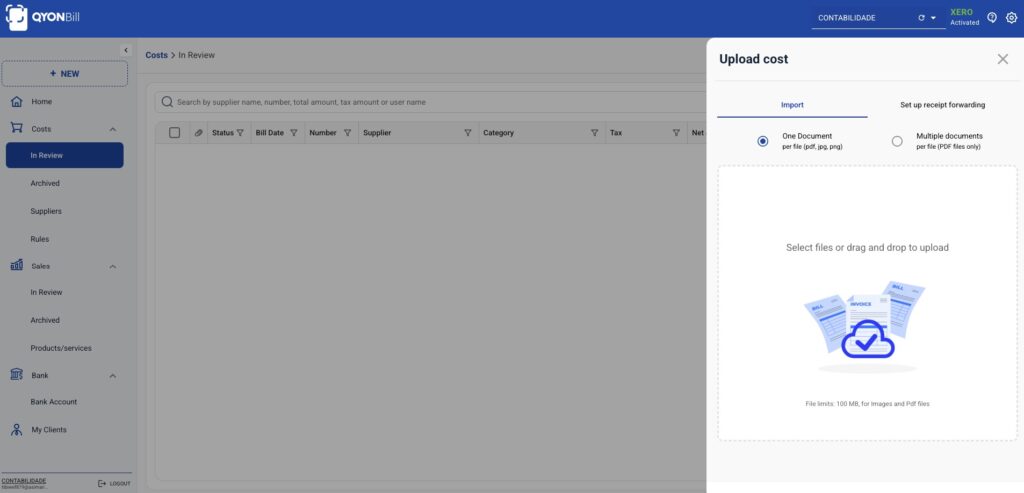
Let’s continue with the integration. Go to Costs → In Review, click the Add button, and import a cost.
Upload the cost by clicking on the upload button or dragging the file into the upload area.
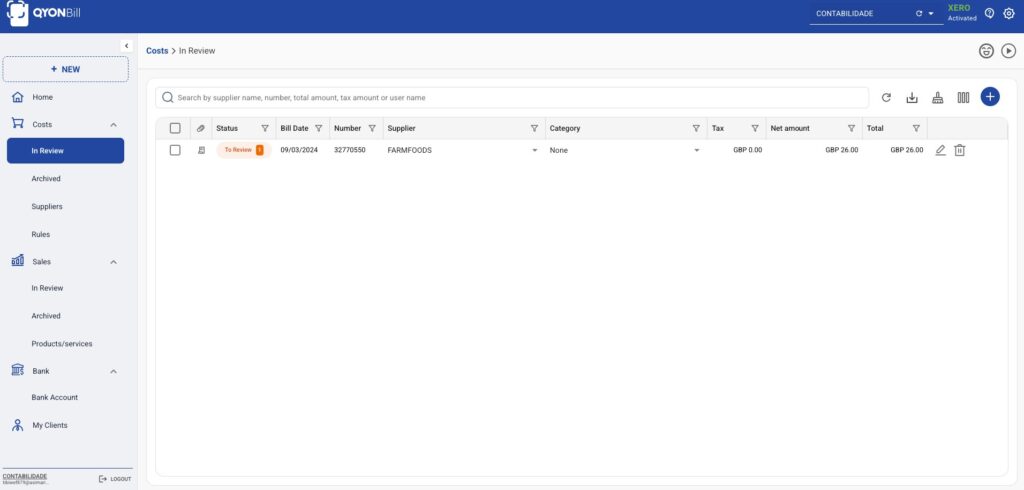
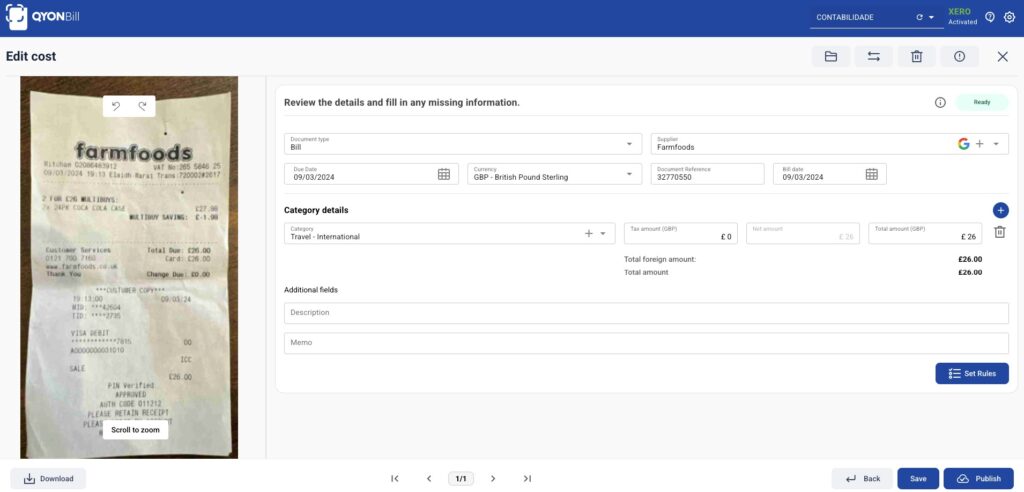
After the upload, it may take a few seconds for the cost to be processed and all related data to be extracted. Once the processing is complete, click on the cost and open the cost editor. From there, you can publish the cost to Xero.
After this, you can select the document type (Bill or Credit Note), supplier, due date, currency, document reference, bill date, and category details such as chart of accounts, tax amount, net amount, and total amount. Finally, click Publish to send the document to Xero.
After this, the document will move to Archived if it is successfully published, or to Review if an error occurs during publishing.